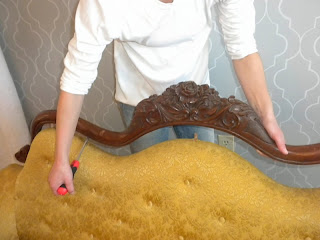
And here it is now:
A closer look at the detail on the top:
And a side view:
A closer look at the detail on the bottom:
And the leg:
And my favorite part, the pleating in the back:
To really appreciate all of the work that went into this project, here are a few snapshots of the process:
If you would like to take on a project like this, here are a few tips:
1. Make sure you have a few people to help you. (if you know someone who has done it before - even better!)
2. Give yourself plenty of time - this takes a lot of work.
3. Buy plenty of staples.
4. Trial and error - it's the name of the game.
5. Have plenty of band-aids on hand - this can get messy.
6. When you're tired, give it a rest. Stepping away for awhile is better than making messy mistakes.
Here are the materials I used for this project:
1. Upholstery fabric
2. Needle-nose pliers
3. Hammer
4. Staple gun
5. Glue gun
6. Foam pad (for seat)
7. Batting
8. Scissors
9. Sewing machine
Start out by removing old fabric from your chair. This can take awhile - there will be lots of staples (or in my case, nails) and sometimes they are difficult to get out. Remove old foam, batting etc. Warning - this can get a little messy so make sure you do this in your garage or outside, or have some type of blanket to catch all of the dust, etc. Save the old fabric so you can use it as a pattern to cut out your new fabric. If you are going to paint the wood on the chair, now is the time to do it. Next, use the pattern and cut new fabric. Lay the fabric on the chair. Have someone else hold the fabric tight while you use a staple gun to staple the fabric on. Sometimes you will need to make pleats if the fabric doesn't pull tight in some areas (see above for a shot of the back of the chair). Don't give up - just keep trying new ways of pulling the fabric tight. Also, in some areas if a staple gun won't cut it try sewing or using a glue gun instead. Once the entire chair is covered in your new fabric, use a glue gun and glue on trim. This will add a little pop of color and give your chair a nice, finished look. Step back, enjoy!


Beautiful job, Kate!! What an amazing transformation!
ReplyDelete