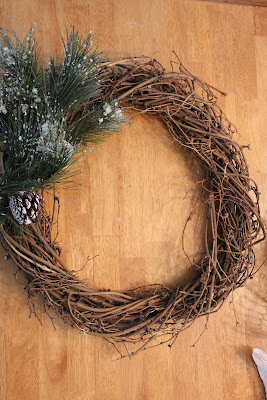
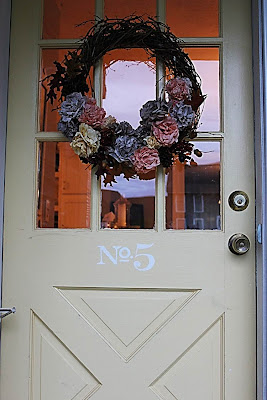
And here it is now:
I really like how the swirls and curls of the grape vine give it a little character, so I decided to leave it partially showing. I think I'll make another to match for my other front door...
If you'd like to give this a try, here are the materials you will need:
1. Coffee filters
2. Wreath or wreath frame
3. Crafters paint (I used red, brown, and yellow, then put brown into all three to mute the colors a bit.)
4. Masking tape
5. Hot glue gun
6. Berries, acorns, pine cones, leaves (optional - I picked some up for $1.09 at Michaels)
First, fill cups (disposable ones are better!) with a few squirts of paint and a little bit of water. Then push a bunch of coffee filters into each cup to absorb the paint. (this is a fun activity for the kiddos to help out with too).
Now pull the filters out, and squeeze excess paint/water.
Dry coffee filters (I used clothes pins on a string for drying ours).
Once the filters are dry, get out your masking tape, and pull out a small strip (as seen below).
Put a bunch of the filters together, (the less you put together, the smaller the flower) and fold into quarters. Now cut a scalloped edge around the outside, and cut the tips of the centers (also in a scallop fashion).
The centers will be used for the inside of the flower. Open it up, then twist in half. Now stick it to the tape.
Now take the bigger part of the filter, open it up, then cut it open.
Now fold and stick, fold and stick, fold and stick, (making a pleat) until you've used up all of the cut strips.
Now roll (starting from the inside "petals") the tape and watch your flower bloom! Continue to do this with different amounts of filters to make both large and small flowers. You will want to make a lot of these to make a nice full wreath.
Now take your flowers, and practice placing them around your wreath - you will probably arrange and re-arrange quite a few times before you have it just the way you want it. (It took me quite a few attempts before finally deciding to glue). Now, use your glue gun and start sticking those beautiful blooms to your wreath frame. Add embellishments if you desire, I used acorns, leaves and pine cones from Michaels to give it more of a "fall" look. Step back, enjoy!


No comments:
Post a Comment