Friday, September 14, 2012

Apple Picking and Craigslist

Happy Friday!  What do apple picking and craigslist have in common?  Well, nothing.  But we did both yesterday. Let me back up a bit.  I had been looking at wingback chairs on craigslist to reupholster and put into my dining area turned kid-friendly play area.  No, you can’t have too many kid-friendly areas in your house, especially with a growing family like our own.  Then, just the other day, I stumbled upon a few “beauties” that were just the right price-a whopping 25 buckaroos for the pair.  Better yet, they were conveniently on our way home from apple picking.

Here are the photos the posting provided: 
 

They are, in a word, scary.  Let's just say the camera "loved" them in these photos.  But, with a little (ok a LOT) of TLC and elbow grease they have the potential to be truly beautiful.  At least that's my goal anyway.  How about a little pinterest inspiration....you in?
 
I love how they decided to use two fabrics to cover this one...how creative! 
 
And the pink and white combo on this one is so pretty...love the ikat design too. 
 
And polka dots are always a personal favorite....
 
And I have a new obsession for nail head trim...will probably incorporate that somehow on mine...
 
Stay tuned for my before and after shots!  Have a great weekend!

Thursday, September 13, 2012

Footstool Tutorial

Good Morning! Popping in fairly quickly today to show you the footstool tutorial then it's off to Nana and Grampie's for some good old fashioned fall family fun. We are taking the kids apple picking, one of my absolute favorite activities as a New Englander. Stay tuned for some snapshots of the festivities... Ok, let's get right to it, shall we? This is so simple to do, and doesn't require a lot of your time. (Moms out there, it can be done in a single nap). Here is a list of materials you will need:

1. Staple gun
2. Fabric
3. Nail Heads for trim (about $1.50 at your local fabric store)
4. Paint
5. Paint brush
6. Sewing machine (optional)

If you plan to paint the legs or any other part of the furniture, it is wise to do this first. I did it last only because at one point I thought I would keep the wood. Later I decided it would look better painted so I had to cover it with a trash bag to avoid painting on my new fabric.

Now take your piece of furniture and flip it over. Remove the current fabric or covering (sometimes it's leather, etc.) A staple remover comes in handy, but is not necessary - a butter knife works just fine too.

Next, either take the old fabric and use it as an outline to cut your new fabric, or just place the piece of furniture onto your new fabric and cut around it, leaving enough around the edge to fold over and make your staples. Take your staple gun, pull fabric tight, staple, repeat. When you get to a corner, fold the fabric into a neat pleat, and staple.


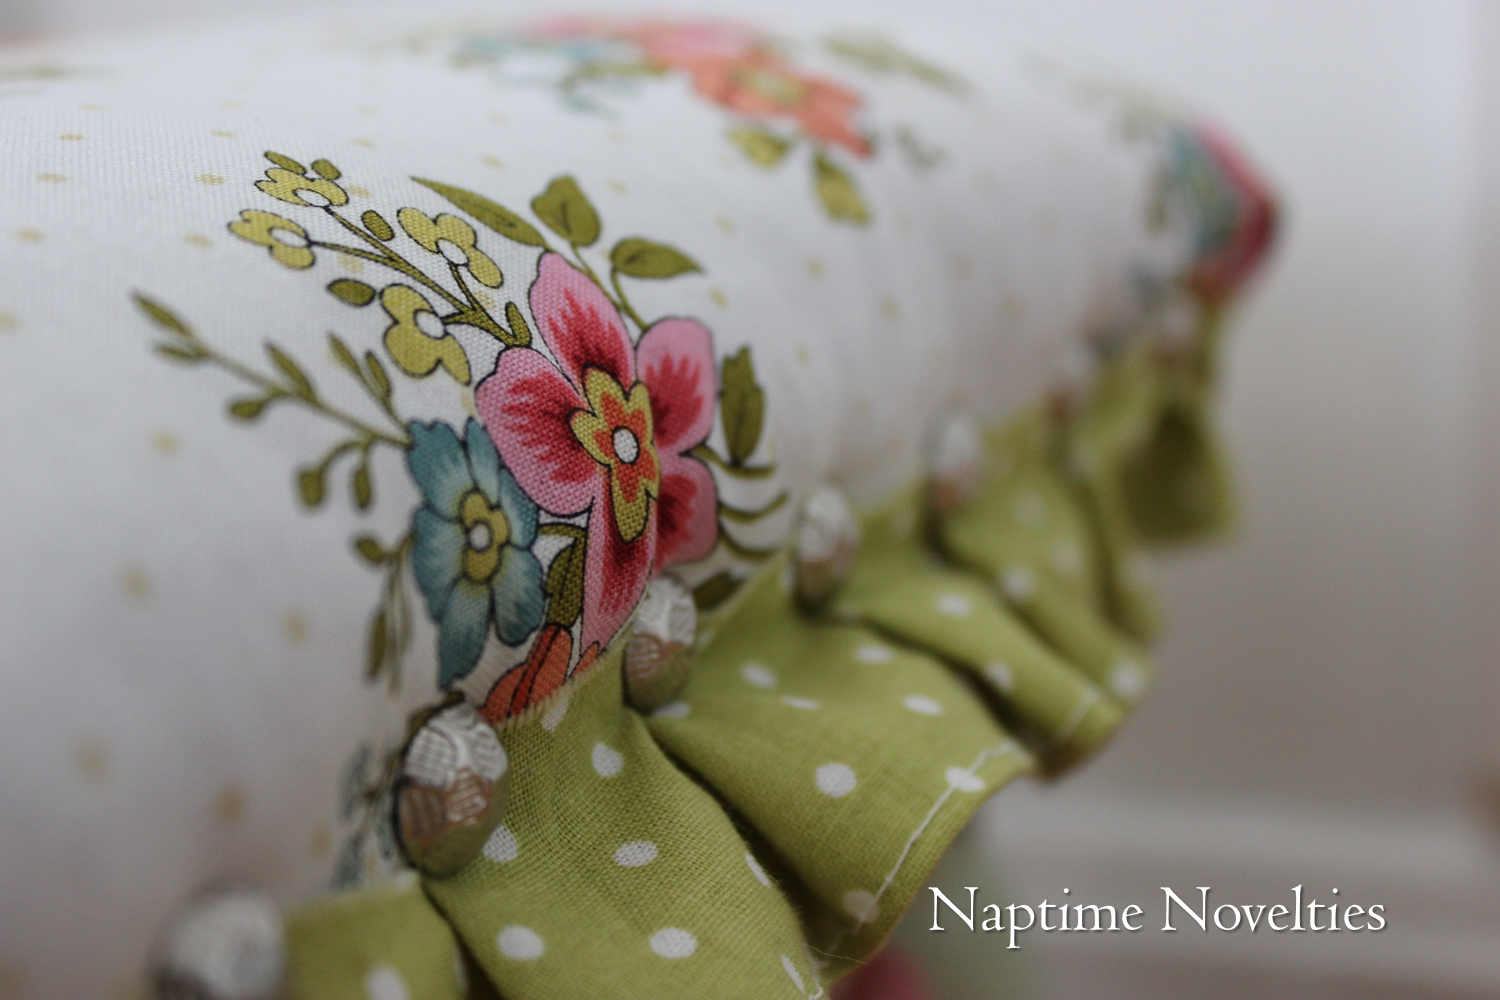
If you want to make a ruffle like mine, just take a long, thin piece of fabric and make a fold on the rough edge. (Mine is only 3 inches wide so I only had enough to make one tiny seam) Iron fold. Sew the fold to make the seam.


Now, take your piece of fabric, and hold it onto your newly upholstered furniture. Take a nail head and hammer in fabric to secure it to the furniture. Give yourself about an inch, fold fabric in and over, and put another nail head in. Continue this step until you've made it all the way around the piece of furniture.


Step back, and enjoy! You did it!
 

Wednesday, September 12, 2012

Evolution of the Downstairs Bathroom

It is safe to say that I change the wall colors in my house as often as most women change their nailpolish.  Ok, well maybe not quite as often, but pretty darn close.  I blame it on not knowing  the direction I wanted to go with in the house when I painted "round 1."  Luckily, paint is easily changed and relatively inexpensive...at least that's how I rationalize it.  When we first moved in, the downstairs bath was a shade of lavender.  I had, at the time, already painted the family room beige and the kitchen artichoke.  The goal was to get the rooms to mesh...flow together, or at least have a common theme.  So, I decided to go with the red (eek) that was in the curtains I'd hung in the family room.  Yes it was a bold choice, and a bold color for such a small bath.  Truth be told I hated it the second I started painting, but I "lived" with it for a few years (aka didn't repaint it right away because I was preggers with my little girl) before finally changing it to something a little more easy on the eyes.  Before we get to the "afters" lets check out where we started:
 
Here is what the bathroom originally looked like when we moved in.  Unfortunately this is the only photo I took, but it gives you a general idea of the color, and dark trim, baseboards and doors we had:


OK, put on your sunglasses, here it is in red (Valspar "Spanish Tile").  Oh gosh, it's like nails on a chalkboard for me...you too? 
Angle 1 before: 
 
Ok, here it is now, same angle: 


Angle 2 before: 
 
Angle 2 after:
 
Angle 3 before: 
 
Angle 3 after: 
 
And here are a few more snapshots, just for fun...  


I chose Benjamin Moore "Healing Aloe" for the walls and painted the trim, baseboards and doors Sherwin Williams "Extra White."  We replaced the old chipping vanity with a gorgeous grey and white marble topped one (a Christmas gift last year - thanks Mom and Dad!).  I added in apricot towels, a vintage dish ($4 at the thrift store) and made a shower curtain out of a liner and a bit of ribbon I found at the dollar store to give the space a little punch of color.  The curtain is from Walmart, I got it a long time ago, it was around $9 for two I think.  I still would like to add a few more accessories like a hanging magazine rack, and something for the little toilet "nook" if you will.  Stay tuned for those updates!  Thanks for checking in, hope you enjoyed it! 

Monday, September 10, 2012

Footstool Makeover Part 2


It really is amazing to me how fast a weekend will pass by.  We spent ours under the lights at a football game Friday night, then at my nephew’s 1st birthday party on Saturday…don’t know what happened to Sunday – it was here and gone in a flash. Now it's back to the grind.  I am literally blowdrying waiting for paint to dry as I write this post.  Truth be told, I had everything set and ready to go last night then decided this morning that the color I chose for legs of the footstool just wasn’t quite right.  Luckily, I had some leftover spray paint in my closet from one of many chandelier makeovers that (fingers crossed) will be just the right shade. 
Here is the footstool “before”


 And here it is now….


I used my 40% off coupon at Jo-Ann's to buy the fabric, it was $3.50 for the flower print, and $0.50 for the swiss dot ruffle.  I also bought 2 packets of nail heads for the trim for $1.50 each.  I mentioned above that I used leftover white spray paint, then just buffed the edges with sand paper to give it a shabby chic look.  Total cost for this footstool, $14...not too shabby!  Check back in later this week for the tutorial.  Thanks for stopping in, have a great day!

Friday, September 7, 2012

Board and Batten: a Tutorial

Happy Friday!  I am excited to share today’s tutorial with you because it is SO EASY TO DO!  Not only is this a simple project, but it also is very inexpensive and creates huge impact in any room.  So, shall we?  First off, tools.  You will need:

1.       Chop saw

2.       Hammer (if you have a finishing nail gun, this would work better, but we used a good ‘ol fashioned hammer)

3.       Finishing nails

4.       MDF (we used 2 sizes, 3.5 inches wide for the chair rail, and 1.5 inches for the vertical planks)

5.       Caulk

6.       White paint (or whichever color your dear heart desires)

7.       Roller

8.       Paintbrush

9.       Pencil
Step One: You will need to determine the height you’d like the chair rail to be.  Ours is 41 inches from the baseboards.  Now, measure the length you need for your first chair rail and cut with chop saw.  Using a level, line it up and hammer that baby in.  Repeat this step until you have hung the chair rail all the way around the room.  See below to see ours:


Step Two: verticals.  Determine how far apart you would like the verticals to be placed. Ours are 10.5 inches.  Use the chop saw to cut a small piece of MDF that is 10.5 inches long and use this as a guide when spacing your verticals…this saves so much time!   Using a pencil, mark the spaces you will need a vertical MDF plank.  Count how many you will need.  Measure, cut, repeat.  Now unless you have flat baseboards, you will need to rotate your chop saw to make 45 degree angle cuts on one end of the vertical plank. Now hammer those beauties in. 


Step Three: (If you used a finishing nail gun you can skip this step) Tap in the nails and caulk.  Now caulk in and around all pieces of MDF.  Let dry.  Now It’s time to paint!  I used a roller in between and as much as I could on all of the boards.  I then used a paintbrush to get in close to the boards and any place that the roller missed.  I used 3 coats of Sherwin Williams “Extra White” to match all of our trim and baseboards.  Step back, and enjoy your architecturally interesting and beautiful masterpiece!  Check back in to see the upstairs bath makeover (Yes, I did hang board and batten up there!)


Wednesday, September 5, 2012

Footstool Makeover Part 1


I might be one of few people out there who still looks forward to the mail (snail mail that is).  Maybe it’s the anticipation that perhaps there will be a letter from a friend or an invitation, or possibly a new magazine or the latest Ballard Designs catalog…something other than the usual bill or piece of junk mail.   Well just the other day this little baby was inside the mailbox and it instantly put a smile on my face.
 
Last year I bought a little stool at one of my favorite antique stores with my growing toddler in mind.  Since she is too small to reach the faucet on her own, I thought this would be perfect for her little toes to step up onto.  Better yet, it was only $7.  Though it doesn’t look like much now, I see potential:
 
With some cute fabric and bit of paint, this old step stool could be adorable.  So, I’ll be packing the kiddos into the car today to see what good old Jo-Anns has to offer.  Is it just me, or do you get side-tracked when you go to Jo-Anns, or to any fabric store for that matter?  I always lose sight of what I'm looking for, and end up spending way too much time going 'round and 'round the isles putting fabric into my cart, then taking it back out again...changing my mind, etc. etc. Well, when I have 2 kiddos in tow, I don't have the luxury of taking my sweet 'ol time.  So my tip?  Surf around pinterest or google images for a little inspiration before hitting the stores.  This helps give you an idea of something to look for and cuts way down on hemming and hawing time.  Here's a little eye candy for you that I found on pinterest to hold you over until I can show you my results. 
I love the fabric and ruffle on this footstool from BHG.com. I'd love to make one of these someday with pockets for books and things for the kiddos.
 
 
  Then there is this beauty from Centsational Girl.  Love the pink ball fringe.
 

...And the stripes on this one is a show-stopper.  Love the nailhead trim too!  There's a great tutorial as well from Grosgrain Fabulous.

 
...And last but not least, the two tones on this footstool from Infarrantly Creative are adorable...love the blue/red combo! 

 
Thanks for stopping by, check back later in the week for my results...have a great day!

Tuesday, September 4, 2012

Ottoman Update

Hi there! I hope you enjoyed the long weekend. Anyone else love rainy mornings? I'm not sure why, but for me rain takes the pressure off the day, and the guilt out of staying inside. Are you the kind of person that gets motivated and gets all your housework done? Or do you rather stay in your jammies just a bit longer and sneak in a little more TV or web surfing? Well today I'm feeling motivated. Perhaps I'll dust off the old paintbrush during naptime...but before I go, I'd like to share a quick project that gave my family room a little color boost while softening the space.

Back when we purchased our furniture, we were kid-free. However, when I was searching for a coffee table I kept in mind that one day we might have a couple of little toddling heads to consider. So when we came across a leather-covered ottoman/coffee table, I was sold. In hindsight, dark leather has a lot of pros and cons: Easily cleaned when spilled upon, pro; shows every spec of dust, con; soft to the touch or in our case, fall, pro; dark and heavy-looking, con. 

Since I'm not a huge duster, I decided to give it a quick little makeover.

Here is the ottoman before:
 
And here it is after the makeover:


If you have a piece of furniture that you want to give new life to, simply add fabric.  Click here to see the bar stool reupholstry tutorial I gave last year.

For this particular project you will need:
  1. Screw driver
  2. Staple gun
  3. Fabric
Turn the furniture over and unscrew cushion.  Place cushion onto fabric.  Cut fabric, leaving a little extra on all sides so you can fold over and staple.  Pull fabric tight around cushion, staple.  Repeat this step until you make it all the way around cushion.  Screw back onto funiture.  Step back, enjoy!